Gazpacho!
I'm sorry, that wasn't a sneeze. Gazpacho is an appetizer attributed to Spain. It's a soup you serve cold, and you don't need to cook any of the ingredients to make it. This makes it a perfect dish to serve when we're in the middle of a heat wave and the thought of turning on your stove or oven is enough to send you into a heat stroke.
Earlier this week, I made a gazpacho and served it with sandwiches. It was the perfect fare for this 93+ week here in PA.
The recipe I followed was this Blender Gazpacho from Martha Stewart. I used two large beefsteak tomatoes, 1 cup roasted red peppers, 3 slices of Udi's gluten free bread that I toasted, 1/2 of a small regular cucumber. The rest of the ingredients were as instructed in the recipe. My John was weary about trying a cold soup, stating the idea of chilled soup was off-putting, but he loved this!
The sandwiches I made were bacon and avocado. Toast four slices of bread, I used Udi's gluten free multigrain. As far as cooking bacon goes, I cut the package in half with scissors so all the bacon slices are half slices. Crisp up enough for 5 half slices each sandwich (10 for two). I buy uncured as I hear those pesky added nitrates are no good for you, plus it's not as salty. Regular bacon is way too salty for us. Cut a ripe avocado in half lengthwise, twist and pull apart. Take the back end of your knife and hit the pit with the blade, twist, and the pit should pop right out. Thinly slice the avocado. Slather on some classic hummus, add the avocado and bacon. It's wonderful with this tomato based gazpacho.
We also eat of lot of meals that are sliced fruits and veggies with hummus, prosciutto or dry sausage, olives, cheese, nuts. It's mostly because it's quick and easy, but in the summer it's also light and refreshing without heating up my kitchen.
What is your favorite summer cuisine at home? Please let me know how you like the gazpacho!
Monday, July 25, 2016

Monday, July 11, 2016
As Close As It Gets
Recently, I have started to get as close to natural as I can. As a Kitchen Witch, it is almost embarrassing that I haven't done this sooner!

Sometime in the last year, I went through my kitchen and dumped anything containing high fructose corn syrup. I cried as I found that included my tonic water. For those of you following along and just getting to know me, I am a huge fan of gin & tonic and gimlets. I immediately started researching tonics and looking for a brand I could drink. Enter Fever Tree! Fever Tree sources the highest quality ingredients and doesn't add in anything artificial. There are no preservatives, no colors, no corn syrup of any kind! They offer several varieties, and just looking at their website now so I could link it up for your convenience, I see they have a new tonic that I have not yet tried. You can taste the difference very easily, no matter what you are mixing it with. I can never drink a hum drum tonic brand again now that I have tasted the awesomeness of Fever Tree Tonic. I can purchase a limited variety at my local Giant and Wegmans. It is over a full dollar cheaper at Wegmans. If you can't find any Fever Tree at your local market, you can order from Amazon. I am also going to take a moment and let you know that Bluecoat Gin is also amazing with its clean and crisp profile and comes in a beautiful blue bottle. Bluecoat is made and bottled right here in Philadelphia, PA. No matter which variety of Fever Tree Tonic you chose to indulge, mixing it with Bluecoat Gin is a perfect combination. Hendrick's Gin is another of my favorites, however, with its rose petal and cucumber infusion, it can be a little too sweet with some varieties of Fever Tree Tonic, like the Elderflower Tonic. I have yet to again purchase Magellan Gin, as it is difficult to find in PA. But that is really the only other gin I drink. Magellan Gin is a lovely hue of blue as it is infused with iris, so again, it may only work well with the regular Indian Tonic by Fever Tree.

I also started making things from scratch, such as household cleaners, laundry soap, etc. I am getting ready to make my own toothpaste and soaps. One of the blogs I found for recipes that I like is Wellness Mamma. She links the ingredients to where you can order them online, if you can't find somewhere local to purchase from. I enjoy this blog for the recipes and what's behind the recipes. She's done a lot of homework and links resources, so I don't have to do the initial hard research. Of course, there are some things I still look into further before trying, we all have to think for ourselves.
Let me know what you think about Fever Tree! Have you tried it before? Are you going to try it after reading this post?
Do you make anything from scratch? What is your favorite item to make from scratch for your home?
Don't forget to check the other pages - post updates don't work when I update them!
Wednesday, June 15, 2016
Pizza!
Backstory: When I came home from Italy, I started to suffer from chronic sinusitis. I was just about always feeling miserable from sinus migraines, post nasal drip, and all the sinus pressure that wouldn't be alleviated by anything. Waking up in the mornings was a ritual of hate and loathing since my light sensitivity was severe and the start of my all day sinus migraine. I was an ENT guinea pig for medications that cost a fortune. All of my allergy testing came back negative, even when they tested my blood. I was barely able to breathe.
I finally found an ENT that suggested surgery for my deviated septum and a procedure to open my sinus cavities in an attempt to alleviate my sinus pressure and help my breathing. I had the surgery about three years ago. I could breathe! However, I still suffer from sinus pressure that no one can attribute to a specific cause. It's not as insufferable as it was before, and I'm relatively happy with the results and how long they have lasted.
Since dairy is a MAJOR mucus producer, we cut it out of our diets in order to help my sinus issues. IT WORKS. Every now and then, I cheat and have some dairy. I suffer for it. During this period of total dairy-free eating, and then slowly reintroducing some really good cheeses into our diets, we discovered that John is lactose intolerant. So we continue to be (for the most part) dairy-free. I have found non dairy substitutes for everything, except cheese. We're just not a fan of the non dairy cheeses.
John continued to suffer from foods and digestion. Several people recommended trying a gluten-free diet. Gluten is also a MAJOR mucus producer. It took over a year to try it, but we finally did last year. John and I both feel so much better than we did before we went gluten-free. We both have more energy and feel younger. My sinus issues are less. John also lost unwanted weight after being gluten free for a couple months.
We will never go back to eating glutenous foods! The benefits outweigh any drawbacks we have found.
Back to pizza: This is one food that we are still testing crusts for. Last night, I made Bob's Red Mill brand gluten free pizza crust. I was excited because I have really liked this brands' products so far, and the package makes two 12" crusts where most brands only makes one. I prepared it according to the package instructions.
This crust was only okay. For a gluten free product not containing corn of any kind, it sure tasted like it would be really good to make Mexican food with. The pizza was edible, but mostly due to my toppings. The edges got nice and crisp, but the center stayed slightly doughy even though I ended up baking for an extra minute than the longest recommended time on the package. If you have a gluten free pizza crust recipe or mix you really enjoy, feel free to share it with us in the comments below! We have tried Nuts.com and Pampered Chef brands so far. I have another brand in the cabinet to try, just don't recall off the top of my head.
Here is how I topped the pizza last night:

-Crumble mushrooms over the sauce. I generally use white or bella.
-3 teaspoons Trader Joe's Artichoke Antipasto.
-Prosciutto. I tore it into chunks. I used two slices of Danielle's Prosciutto from the deli counter. It was $9.49/lb and tastes just as good as the stuff you buy pre-packaged at $6/3oz.
-Typically I would use fresh garlic and herbs from the garden, but I didn't. I sprinkled Garlic Powder, Fresh Ground Black Pepper, Oregano, and Basil.
-When you have about 5 minutes left of baking, throw on the Smoked Sun-Dried Tomatoes.

Thursday, May 19, 2016
Spring Madness
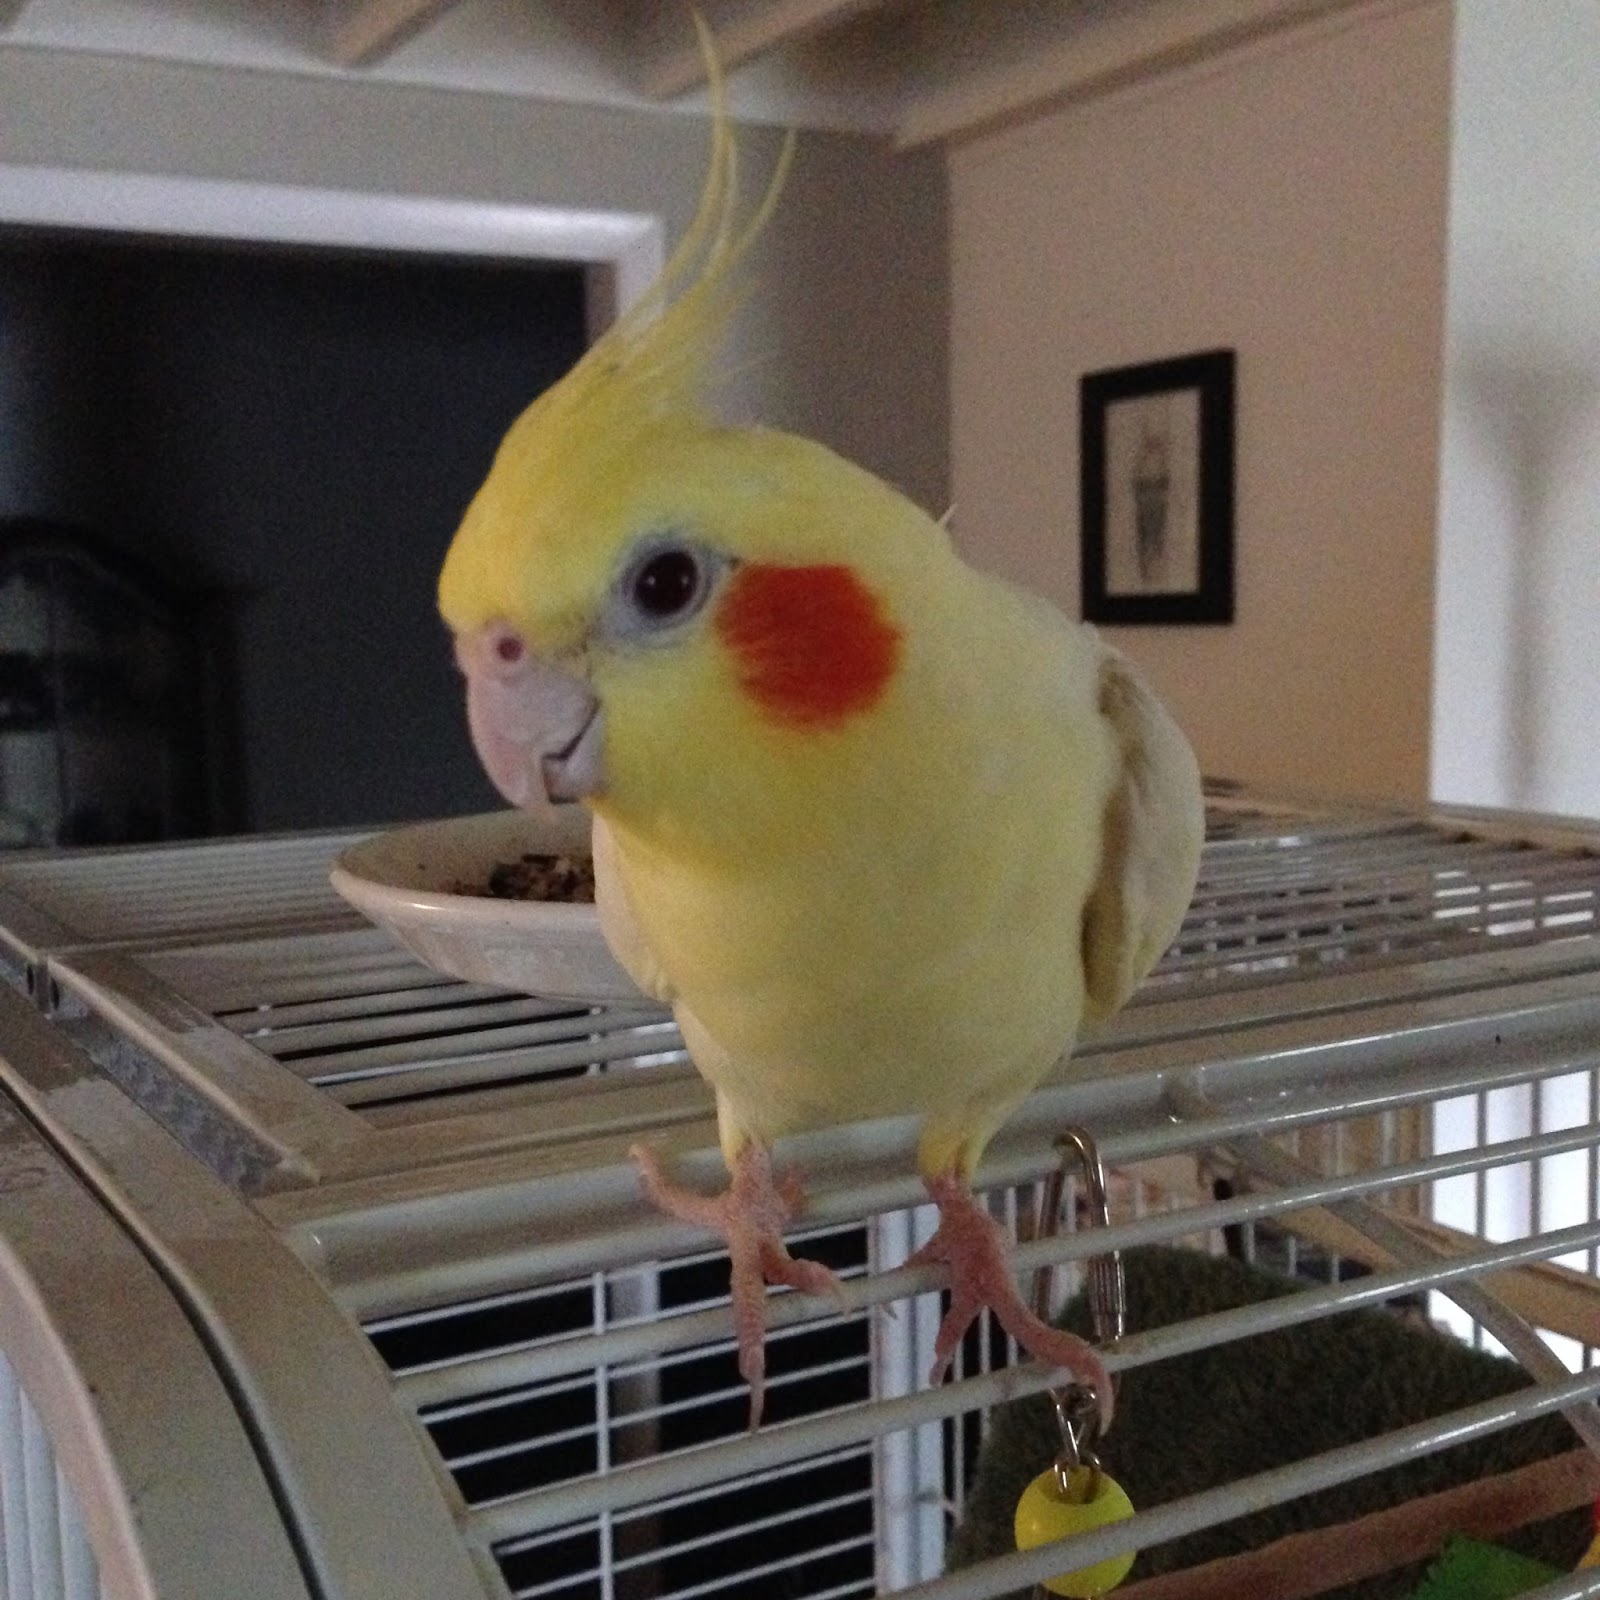
Not too long ago, my Baby Boy was sitting at deaths' door. He lost a quarter of his weight, wasn't eating, wasn't moving, always sleeping and keeping to himself. It's a horrible story about coming to mistrust in doctors that I don't really want to get into right now. But it all started a downward spiral. I am happy to announce that Astraeus is doing much, much better! He's back to his chipper self, with the exception of some feather loss. He's singing and carrying on, he's excited to see people again, and he has gained back all the lost weight!


After this ordeal, it was great that the weather was warm and the sun was high in the sky! John & I took a good friend and his lady out to Nockamixon State Park for a round of disk golf. It turned into nature adventure! We saw frogs, toads, butterflies, snakes, and turtles throughout our hike of the back nine.

Then the weather turned cold and rainy again. I'm not going to complain, this is standard for Spring in my neck of the woods. Even though it's expected, it can get you down to a place where you don't want to leave the comfort of your blanket on the couch in front of the tele. It was a tough week of struggling to find the motivation to move! Life happens sometimes in a way we don't like. This past couple weeks felt like everything was working against me. However, I did make some progress towards goals and I need to celebrate them, no matter how small.
THAT is how we survive, by celebrating any reason we can think of. I took some online webinars about running a photo business. I finally ordered business cards! We watched Deadpool for the second and third time ;) I cuddled with my boys, Astraeus and Smokey. I sold my last in-stock large canvas print! I made a To-Do List so I can track my progress, and feel more accomplished in working towards my goals.
I have an amazing support system, especially my John. Everyone needs to have one person who will be there to tell you that things will get better. If you don't, you just haven't realized it. Think about who you know and how they make you feel. I bet that one person will stick out for happiness, or for great advice. I also have a great mom. I know I can call her any time, day or night for whatever emergency I have. She makes time to be there for me when I need her. I am lucky and grateful.
If you still don't know who you can turn to when you need encouragement, please feel free to turn to me. Or at least to a Facebook Group I admin: Saving Someone, One Talk at a Time. This crazy weather gets us all from time to time. If you need a support person, we are around. You need only ask.
Friday, May 06, 2016
Adventure: New Hatchy
When John and I moved in together, he had a new hobby: raising and breeding insects. Over the years, I have had the pleasure of seeing several insects I normally would not have had the chance to see up close. I love tiny creatures.
Most moths are nocturnal, so you wouldn't see them about in the day like you see butterflies. But they are just as beautiful.


The other day, we had a new hatchy: Hyalophora Cecropia! I know that sounds scary, but really it is quite beautiful. This is a moth native to PA. We had a male hatch, we released him after a couple days. Then another male hatched. The day he passed away, a female hatched from her cocoon.
It is sad that they did not hatch together so they could mate. We set the female outside at night in hopes that her pheromones will attract a mate. However, either it is too early in the season or we are no longer a region of their natural habitat as no mates have come to her yard.
Most moths are nocturnal, so you wouldn't see them about in the day like you see butterflies. But they are just as beautiful.
Say hello to the Cecropia Moth.


Thursday, May 05, 2016
The AB Method
I found an amazing recipe for making buffalo wings on Alton Browns' website and tweaked it to our preference over a couple of times making chicken. Yes, I said making chicken, as I apply this method to a few different cuts of chicken, not just wings. You see, we like our chicken buffalo style but don't always have wings on hand. Also, wings are more expensive than drumsticks or thighs.
(You can also roast your chicken this way and sauce them however you want, I'm doing a little bit of BBQ sauce too.)
With this method, you can render most of the fat from your meat which
1) is more healthy
2) allows the skin to get crisp and
3) means less smoke in your kitchen when you open the oven
We start by steaming the chicken drumsticks for 20 minutes. Just take a large pot and put an inch or two of water in it, then set a steamer basket in the pot. Add chicken, cover, turn burner to medium low. Once you see water start to collect in the lid, set timer for 20 minutes. Bigger cuts of chicken will require longer steaming.


Prepare a secondary cookie sheet, this time lined with parchment paper, and topped with a cooling rack. Check on your butter once in a while to make sure it is melting, and not getting to the point of burning. We want to keep it melty and warm until we need it, and we want to let that garlic flavor meld into the butter as long as possible.
Now, according to AB (who is, by the way, my most favorite culinary genius of all time), Frank's Red Hot is the original sauce brand used when buffalo wings were invented. So, needless to say, that is the brand of hot sauce and wing sauce we use. Feel free to substitute your favorite, but know that results will vary.

You can combine the following ingredients into your bowl at this time, or wait until the chicken is in the oven:
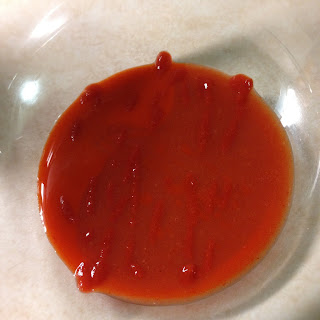
1/8 cup hot sauce, 1/8 cup wing sauce, and drizzle in the sriracha sauce. Mine looks like the following image
Once the oven is heated to the correct temperature and the chicken has completed its chill time, transfer to your secondary cookie sheet and cooling rack, placing the chicken skin side down. Pop into the oven and set a timer for 20 minutes. Once the timer goes off, turn the chicken over and set your timer for an additional 20 minutes. The chicken should now be roasting skin side up.
When the timer is a few minutes from going off, you'll want to mix your garlic butter into your sauce bowl. If you're like me (and in this case you really should be like me), I wash my tongs between uses so I'm not touching cooked chicken or anything else with tongs that have touched raw chicken. I use my clean tongs to mix it up thoroughly, and it does take a few minutes to fully combine the sauces with the butter.
As the timer sounds, take the chicken out and individually toss in the sauce and place back on the rack. Stick the chicken back in the oven for 5 minutes. You can go ahead and turn the oven off, the residual heat will bake the sauce onto your chicken.


If you try this method the next time you're in the mood for buffalo wings, let me know how it turns out! Also, feel free to get creative with sauces and share those ideas in the comments.
(You can also roast your chicken this way and sauce them however you want, I'm doing a little bit of BBQ sauce too.)
With this method, you can render most of the fat from your meat which
1) is more healthy
2) allows the skin to get crisp and
3) means less smoke in your kitchen when you open the oven
What You'll Need:
FOOD
-Enough chicken to feed two people
-3oz Butter
-1 Large Clove Garlic (or 2 Medium Cloves)
-1/8 Cup Hot Sauce
-1/8 Cup Wing Sauce
-Sriracha (to taste)
HARDWARE
-Large Pot
-Steamer Basket
-Small Saucepan
-Medium Bowl
-Cutting Board
-2 Cookie Sheets
-2 Cooling Racks
-Paper Towels
-Parchment Paper
-Knife
-Tongs

While the chicken steams:
-Set aside 3oz of butter, a large clove of garlic, and a small saucepan.
-Set out a cookie sheet and line it with paper towel, then place a cooling rack on the paper towel.
-Make space in your refrigerator on the bottom for the cookie sheet to fit in.
Once the chicken is finished steaming, transfer to the cooling rack on the cookie sheet lined with paper towels and place in fridge for at least 20 minutes.

During this chill time, preheat the oven to 425˚F. Chop the garlic, and slice the butter so it melts better. Put both ingredients into the small saucepan and turn to lowest heat setting on your stove top.


Prepare a secondary cookie sheet, this time lined with parchment paper, and topped with a cooling rack. Check on your butter once in a while to make sure it is melting, and not getting to the point of burning. We want to keep it melty and warm until we need it, and we want to let that garlic flavor meld into the butter as long as possible.
Now, according to AB (who is, by the way, my most favorite culinary genius of all time), Frank's Red Hot is the original sauce brand used when buffalo wings were invented. So, needless to say, that is the brand of hot sauce and wing sauce we use. Feel free to substitute your favorite, but know that results will vary.

You can combine the following ingredients into your bowl at this time, or wait until the chicken is in the oven:
1/8 cup hot sauce, 1/8 cup wing sauce, and drizzle in the sriracha sauce. Mine looks like the following image

Once the oven is heated to the correct temperature and the chicken has completed its chill time, transfer to your secondary cookie sheet and cooling rack, placing the chicken skin side down. Pop into the oven and set a timer for 20 minutes. Once the timer goes off, turn the chicken over and set your timer for an additional 20 minutes. The chicken should now be roasting skin side up.
When the timer is a few minutes from going off, you'll want to mix your garlic butter into your sauce bowl. If you're like me (and in this case you really should be like me), I wash my tongs between uses so I'm not touching cooked chicken or anything else with tongs that have touched raw chicken. I use my clean tongs to mix it up thoroughly, and it does take a few minutes to fully combine the sauces with the butter.
As the timer sounds, take the chicken out and individually toss in the sauce and place back on the rack. Stick the chicken back in the oven for 5 minutes. You can go ahead and turn the oven off, the residual heat will bake the sauce onto your chicken.


Pour the extra sauce into a ramekin or other small dish for dipping and serve alongside the buffalo chicken. Enjoy!

If you try this method the next time you're in the mood for buffalo wings, let me know how it turns out! Also, feel free to get creative with sauces and share those ideas in the comments.
You can see ABs' original recipe here: http://altonbrown.com/buffalo-wings/
Wednesday, May 04, 2016
Getting Started
I grew up with a love of art and creating art. For a long time my passions were drawing and painting. My parents always fostered and nurtured my creativity and urged me to continue with my art. They always told me I could be whatever I wanted to be when I grew up, even an artist.
But there were too many things I wanted to try and do and see, so I struggled for a long time with finding myself and a path for life that would be happy. I have had many adventures along the way to where I am now.
Among them was my move to Chicago, IL to attend Harrington College of Design for a degree in Digital Photography. I graduated with an AAS in August of 2011. I was about to be turning thirty.
By this time I had spent several years away from my family, and when I graduated with my degree I decided to move back to Pennsylvania and cultivate my family relationships. I wanted my niece and nephew to know me, and I wanted to know them!
With bills needing to be paid, and struggling to find employment in my field near my family, I settled for a job outside of photography after four months. I threw myself into my new work, striving for success and advancement. I did advance quickly, and so I stayed with this company for four years. I was completely miserable working behind a desk for eight hours a day.
I am no longer with that company, and have set out to launch my photography business: Karmic Images this May 2016. I am excited and freaked out to be giving this a go. I love photography. I love food. I love to travel and have adventures. I love my boys and my family.
This blog is where I will keep my story of trying to live life to the fullest and not starve in the process of starting my business. I hope you'll tag along for the ride!
 |
| Astraeus aka Baby Boy |
 |
| Smokey aka Sweet Boy |
 |
| Mid-Atlantic Air Museum World War II Weekend A-Day June 2015 |
Subscribe to:
Posts (Atom)